Issue Fix
Use Seer's issue fix to automatically find the root cause of issues and generate code fixes.
Issue fix is Seer's collaborative workflow to find the root cause of and solution to issues. It uses Sentry's context (issue details, tracing data, logs, and profiles), your codebases (integrated through GitHub), and its interactions with you to identify and reason through problems in your code.
Issue fix can be automated, allowing it to populate root cause analysis, solutions, and even pull requests as issues occur.
Issue fix builds upon the capabilities previously known as Autofix.
Seer's issue fix flow follows a three step process:
- Root Cause Analysis: Analyze the issue using Sentry's context and your codebases and determine the root cause
- Solution Identification: Identify a solution based on the analysis
- Code Generation: Generate a code fix and open a PR
When you begin debugging an issue with Seer, you will see a screen like this, which includes the high-level issue summary and a button to start the issue fix flow:
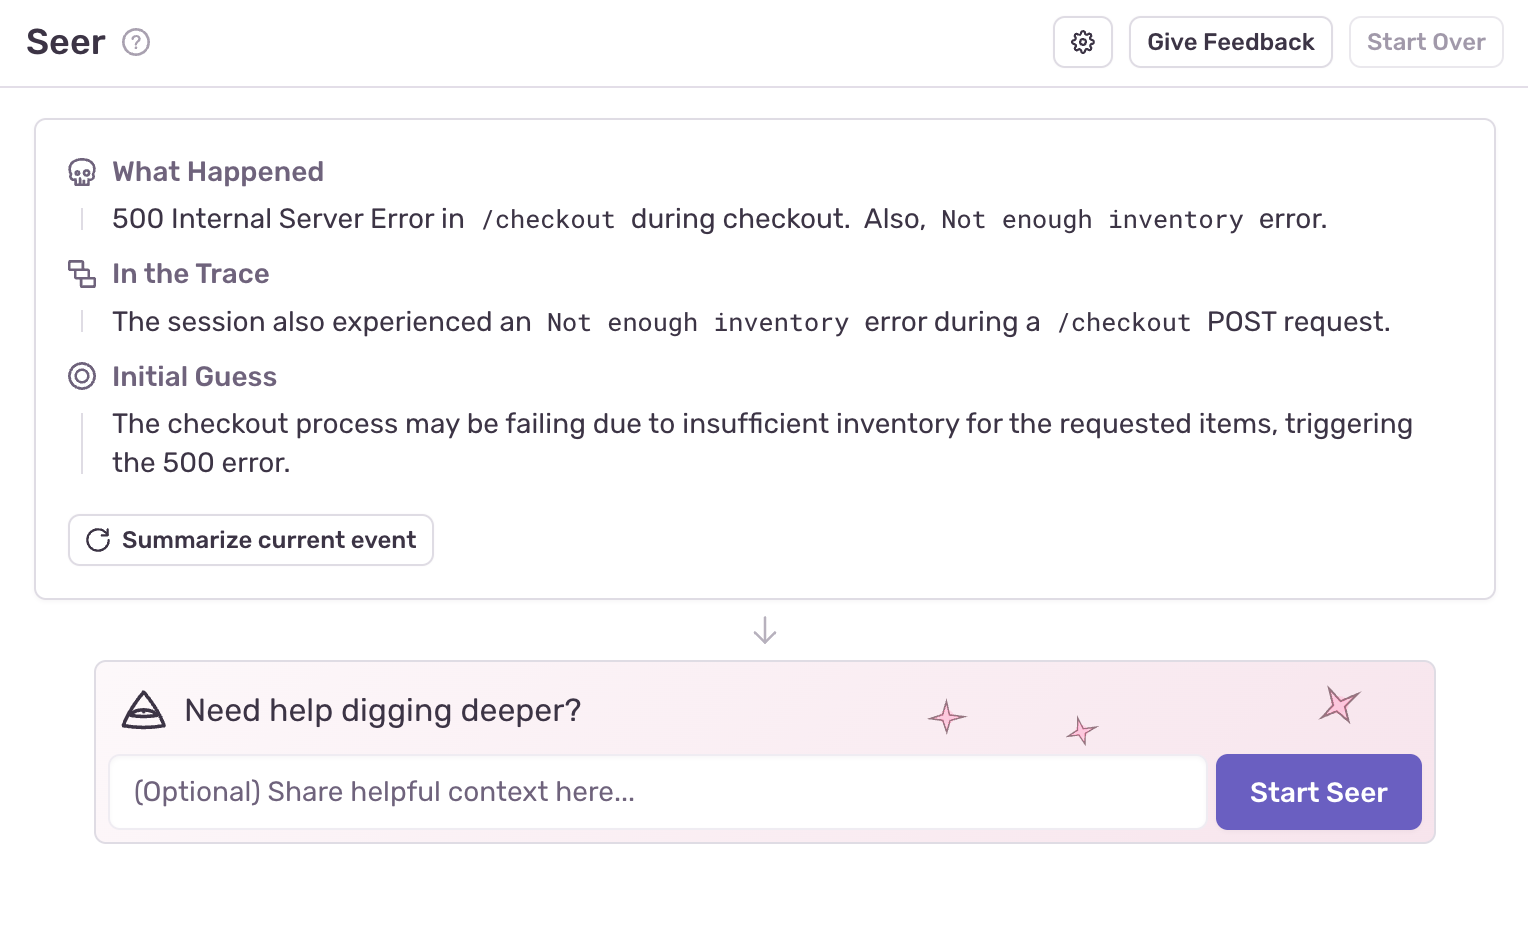
Seer will then analyze the issue and relevant code to help identify the root cause and propose a solution. You'll see a live stream of Seer's thought process in real time as it works through the problem. Seer will share key insights as they come up and you'll have the option to expand each. You'll see the event data and code that support Seer's conclusions, building a clear chain of reasoning back to the root cause.
While Seer is reasoning through your problem, you can step in to add context or feedback; collaboration tends to lead to the best results. If Seer encounters gaps in its understanding, it will ask for your input.
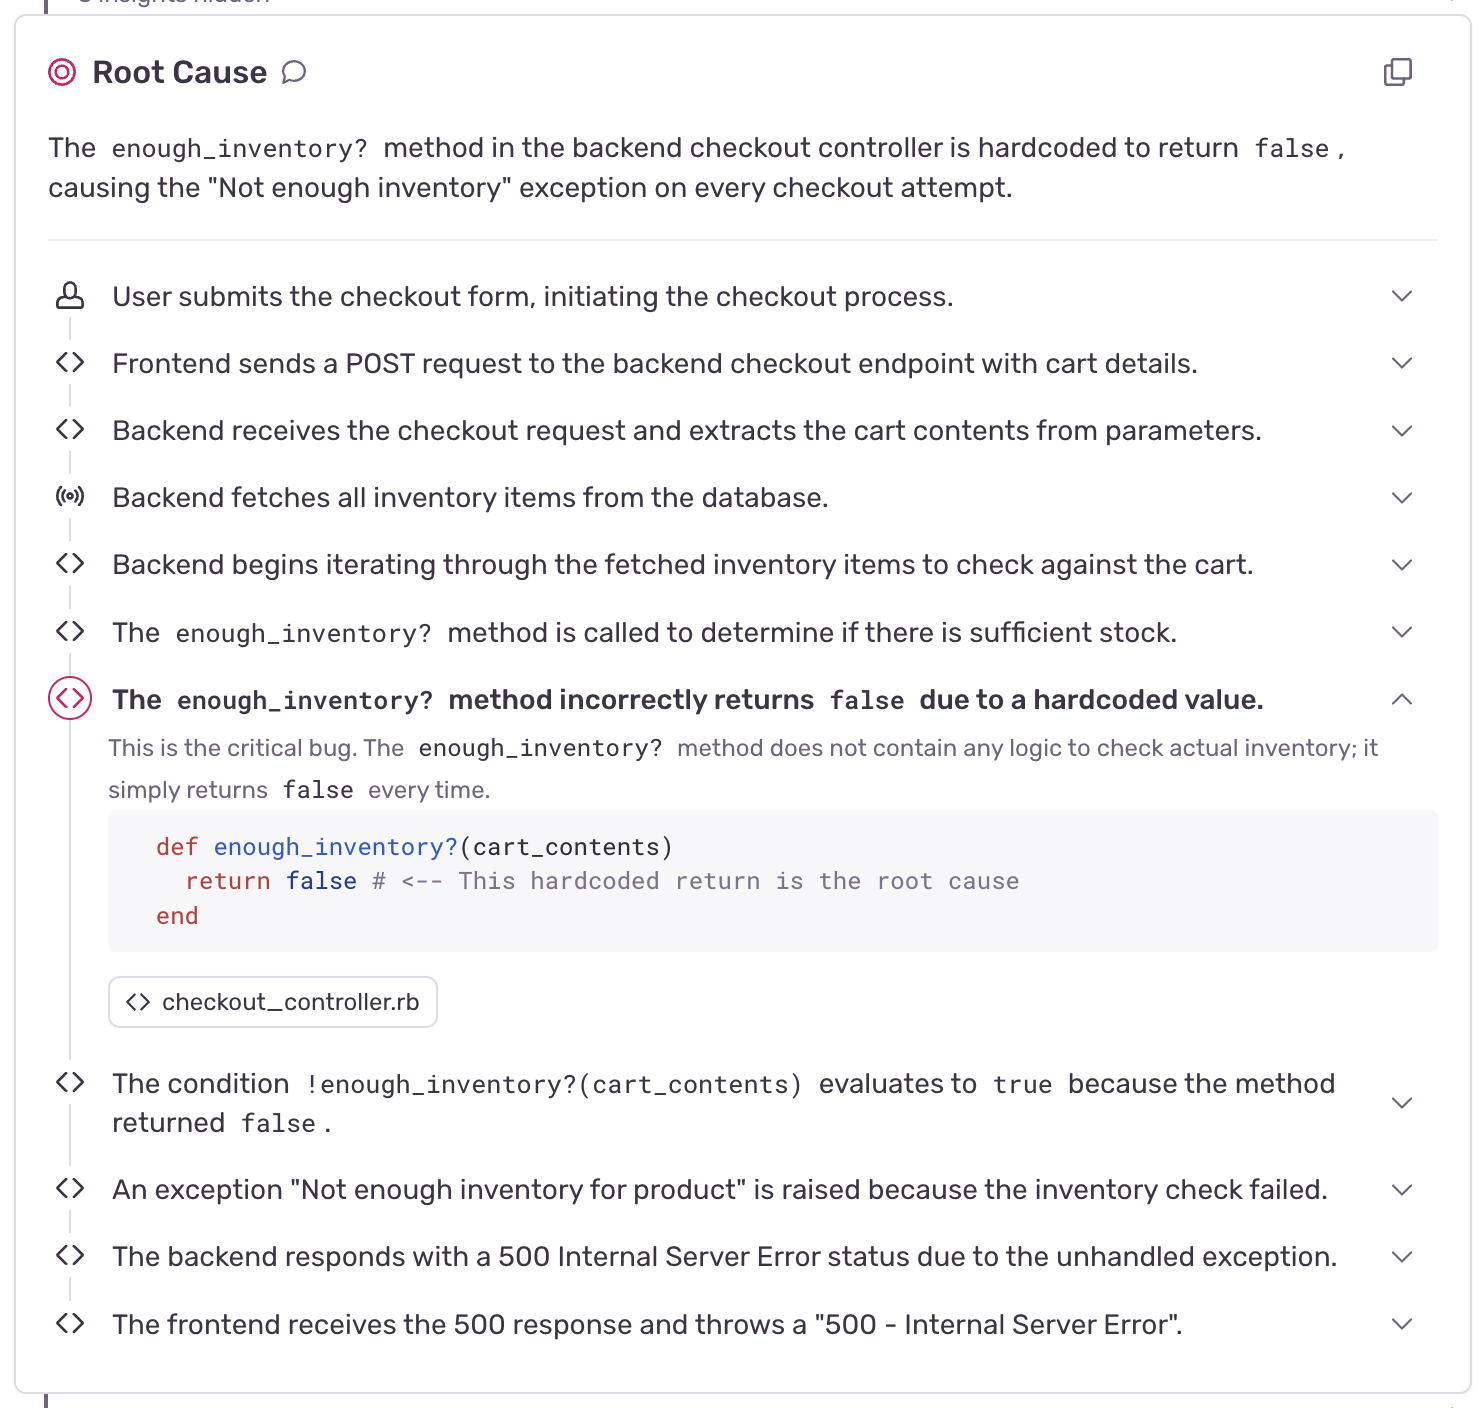
The final root cause analysis will show you the sequence of events that led to the issue, and a detailed analysis of the most likely culprit. This analysis includes helpful annotations, such as links back to the exact lines of code or Sentry telemetry that are relevant to the analysis.
Once Seer has completed its root cause analysis, it will begin searching for a solution. The process will be familiar: you will see a chain of reasoning appear as it begins working through the problem, and you are free to collaborate with Seer at any point.
When it's finished, you will see the recommended solution. From here, you can:
- Remove any steps or actions that you disagree with
- Add any additional steps or instructions, for example request additional unit tests to prevent regressions of the original error
Once you are ready to proceed, you can select "Code It Up" to generate code resolving the bug.
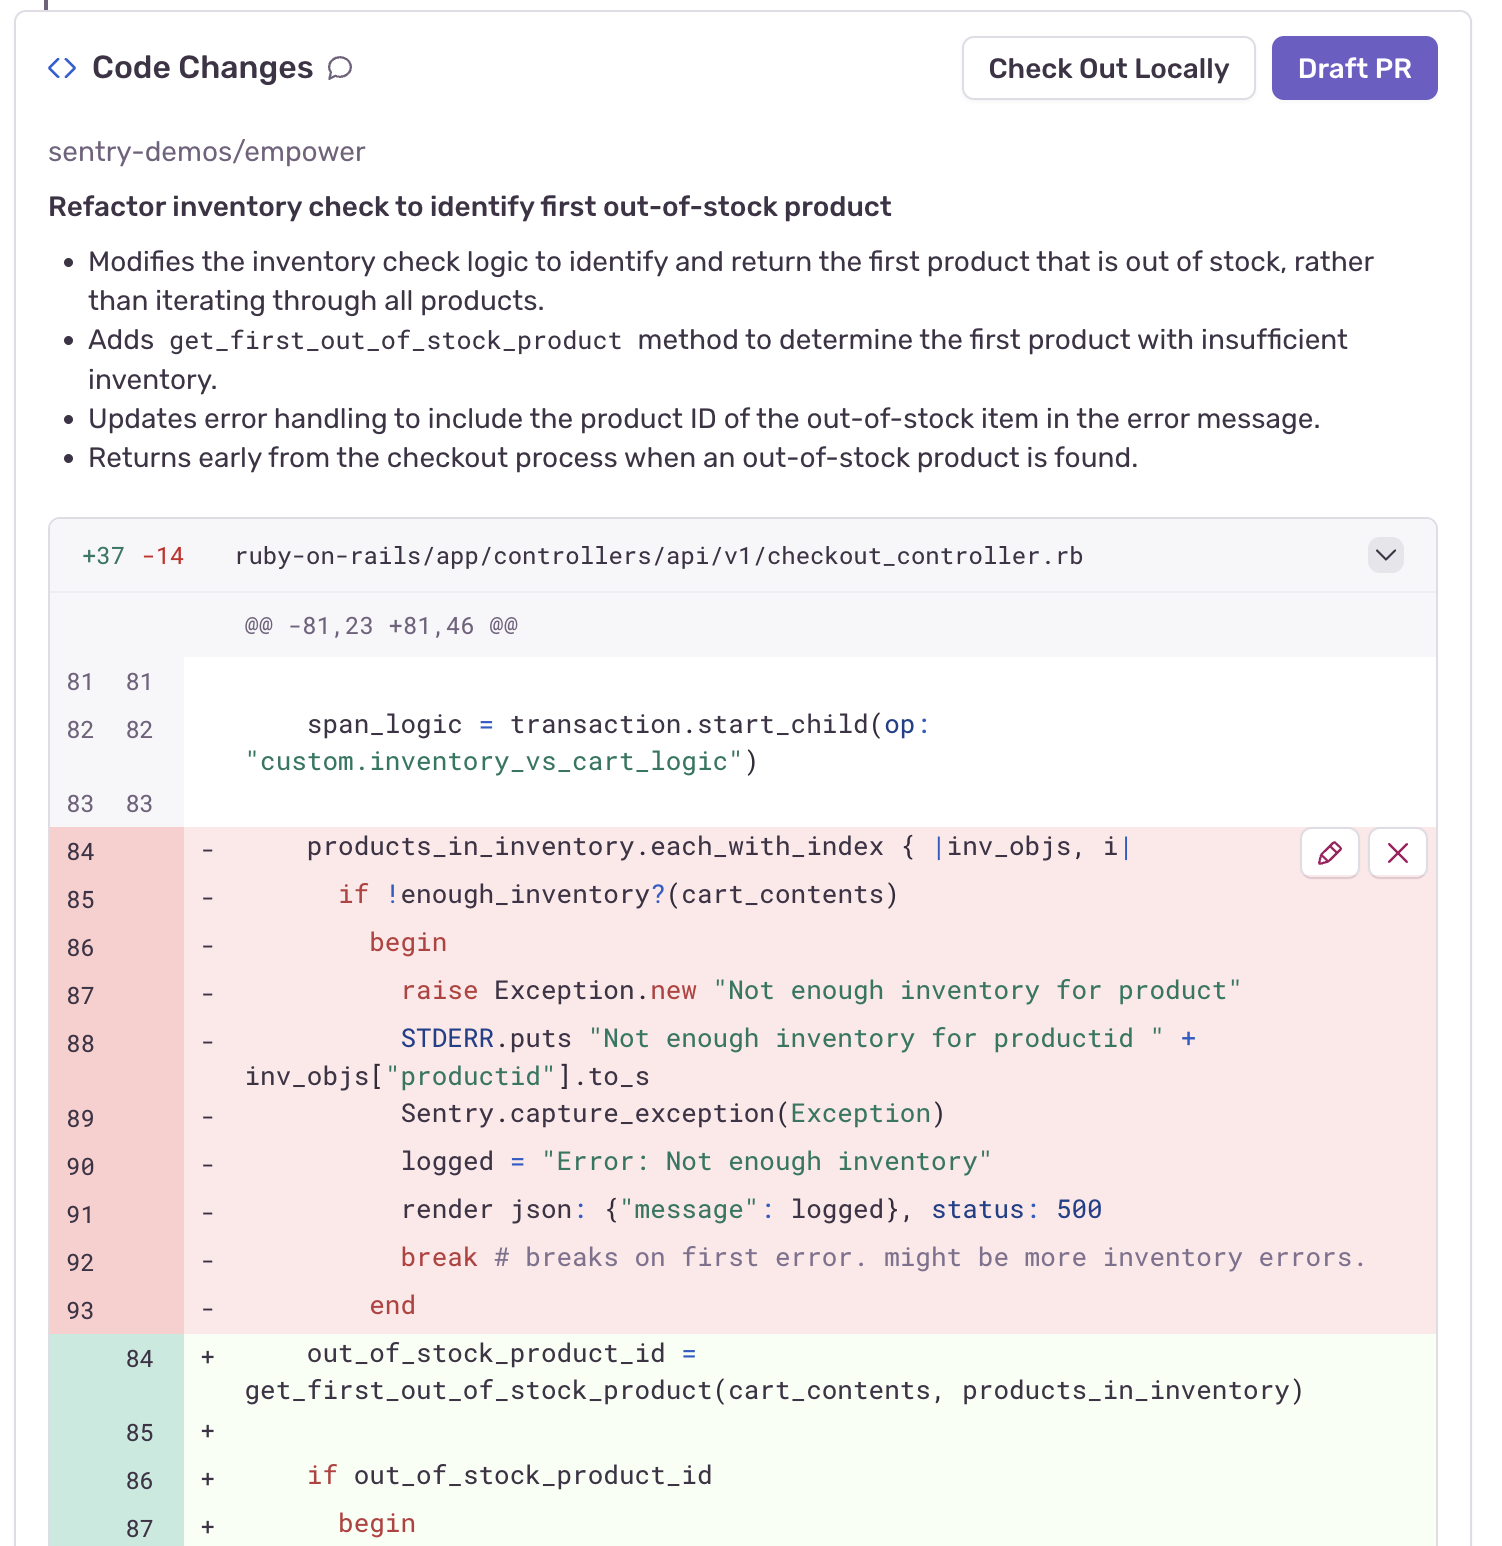
During the coding step, Seer will identify the code patch(or patches) needed to implement the solution. When it's done, you'll see a preview showing the suggested diffs across your codebase. If the fix involves service dependencies, you may see edits spanning across multiple repositories.
From here, you can choose to draft a PR, or checkout the code changes locally for further iteration. If you choose to checkout the code locally, Seer will make a new branch for you.
Seer is a powerful debugging agent, with access to a wide variety of data sources and tools. While debugging issues, it may examine:
- Issue details: Error messages, stack traces, and event metadata from your Issues
- Tracing data: Distributed traces and span information
- Logs: Structured Logs from your application (beta)
- Your codebases: Relevant code from linked GitHub repositories, with support for multiple repos for distributed services
- Performance data: Profiles and performance metrics
- Interactive feedback: Your input and guidance during the process
This context is crucial to Seer's capabilities, and it allows it to do things like investigate a backend service that may be the true root cause for a frontend bug you are trying to troubleshoot.
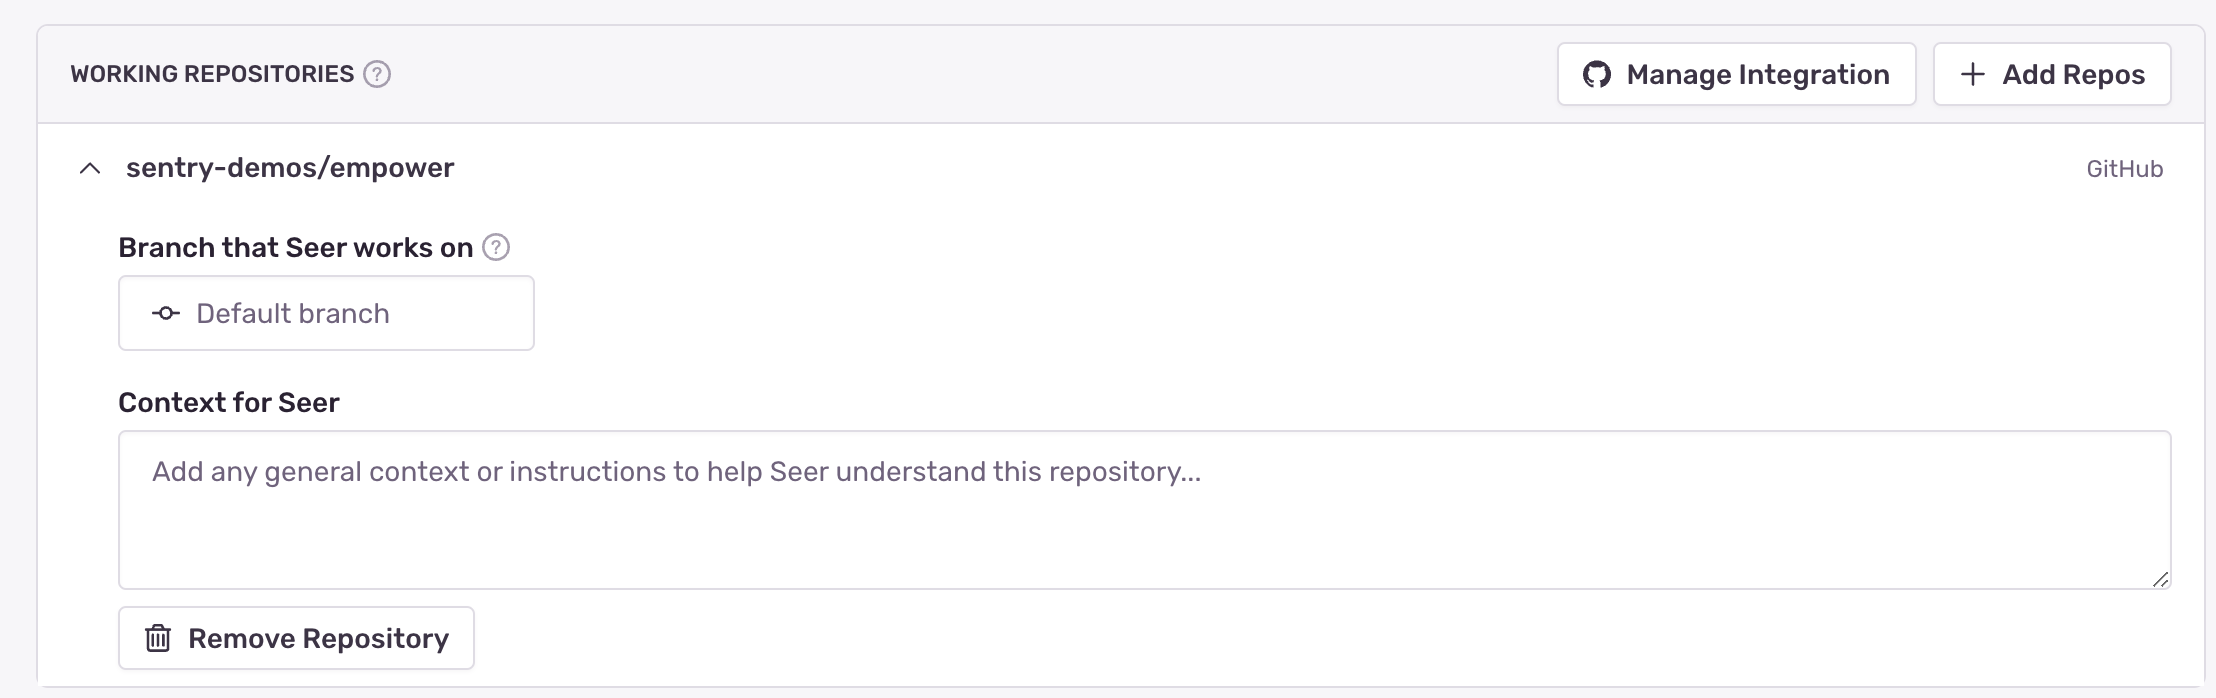
Issue fix's default behavior can be customized in several ways:
- You can manually customize the repositories it has access to
- You can define the default branch it should use in each repository
- You can add any additional custom context that that may be useful within the scope of each individual repository
Seer already automatically parses rules files from Cursor, Windsurf, Cline, and Claude Code
- Setup the GitHub integration, allowing Seer access to your codebase and enabling it to generate code fixes. Enabling the GitHub integration will help Seer to provide better results. See the Sentry GitHub integration to learn how
- The more Sentry context you have, the better equipped Seer will be to help: consider instrumenting your application to collect traces, profiles and logs, and send them to Sentry.
- For JavaScript / TypeScript projects that are minified in production, upload source maps to Sentry for the best results
Currently, GitHub is the only SCM supported by Seer. We are currently working to add support for other services including GitLab and Bitbucket.
Our documentation is open source and available on GitHub. Your contributions are welcome, whether fixing a typo (drat!) or suggesting an update ("yeah, this would be better").